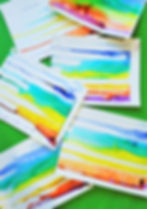
Watercolor Rainbow Process Art
- Feb 3, 2023
- 2 min read
Oh my goodness! It has been a hot minute since my last blog post! I am thrilled to be back in this space. It feels so good to not only make art with the kiddos again but to write! Writing, like art, is another creative process that gets me jazzed. Between these two expressive forms, I'm living my best Fri-Yay life. I digress. :) Let's talk process art and rainbows! Read on for more tips and tricks to achieve this fun and beautiful art!

Gather:
Thick Cardstock
Basic Watercolor Set (single row)
Small Squeeze Bottle
Create
1. Fill your squeeze bottle with water. Saturate the watercolor set fully. TIP: You want the colors to "loosen" up. Use the blunt end of a paintbrush to move the water and paint around. This
will help the paint absorb the water more effectively.
2. Lay your cardstock on the table while your paints are hydrating. TIP: Use painter's tape around all 4 sides to create a frame for your picture.
3. Once the watercolor paints have become soft, add a little bit more water to each color on the set.
4. Place the edge of the set on the top portion of your paper.
5. Hold the paint set at an angle, with the top towards you. You want the paints to begin to drip out onto the paper. See video above.
6. Drag the set towards you, allowing the paint to stain the paper. Add more water if your paint is not flowing onto the paper. You will need to add water each time you try this process!

Tip: Try sliding the watercolors right to left or in a fluid motion of your kind. The effect is really neat!
7. After the paint dries, remove the painter's tape and enjoy your stunning art!
Thank you for reading! Having a great weekend!
Mary Alice, XX


